Eyeliner techniques
Eyes, eyeliners and current make-up trends on the catwalks
Monday 19th October
Today we had another guest lecturer. Her name is Holly and she works for the MAC Pro Team in Soho. She talked about current MAC make-up trends on the catwalks, and recreated one of them for us in her demo.
So let's see these trends:
- Beautiful and damned eyes: Smokey eyes with eyeliner; "slept in" hair look; pale skin and dark berry lips.
- Strength of Beauty: Fresh, dewy skin; Rosy cheeks; Blended eyeshadows and defined brows
- Love worn: Strobing, iridescent, highlighted skin; Grey and mushroomy colours on the eyes; Matt lips
- Red 70s: Revival of red lips but more rusty reds and burnt oranges; Mustardy, terracotta colour eyes
In today's lesson we've been shown how to create two different eyeliner looks. One was a more natural look with softer, natural eyebrows and the other was a more intense, defined cat-eye look with strong, sharp brows.
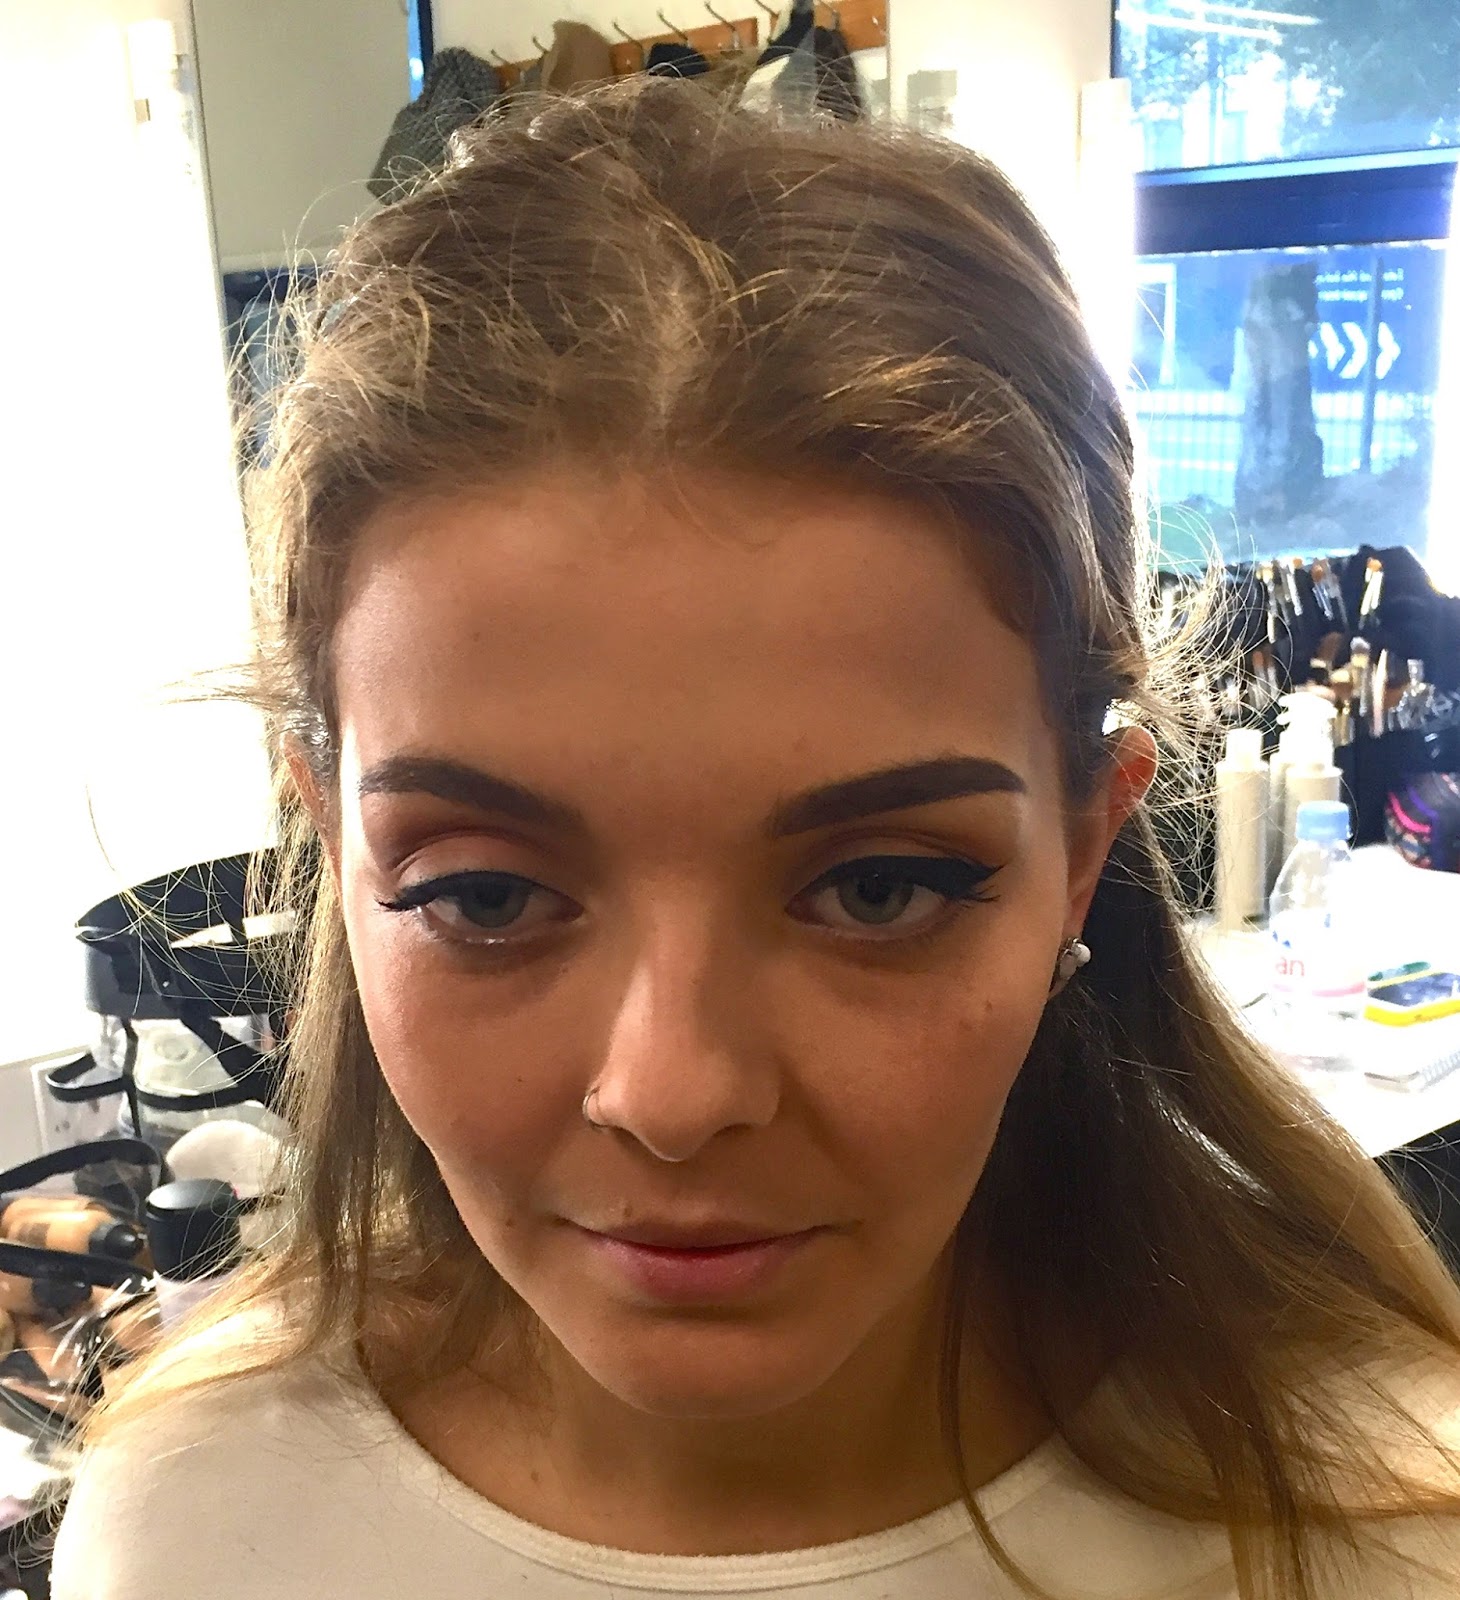
After Holly applied the face products (concealer, foundation, setting powder, contour, highlighter, blush) she started focusing on the eyes. Again she created a softer look on the right hand side and a classic, more defined look on the left hand side.
For the softer look she used brown eyeshadows to fill in the gaps in the eyebrows.
On the other side, she used a pencil to draw on the base and top line and than filled in any gaps.
Practical:
After we paired up I cleansed, toned and moisturised my model's skin.
As today we had to focus on the eyes, I did not spend too much time on perfecting the skin. I applied two different foundations onto my model's skin. One lighter shade to highlight the centre part of her face and a darker shade to the outer edges of her face.
I concealed her under eye area and powdered it. I also applied a loose powder to her forehead to make it a bit more matte.
I than highlighted the high points of her face such as the top of her cheekbones, above the eyebrows and the bridge of her nose by applying a slightly gold toned eyeshadow.

I then moved onto the eyes. After applying a reddish toned, warm brown shadow to the eyelid and defined the crease with a mix of dark brown and a touch of black eyeshadow I moved on to the eyeliner.
 I used Black Track by MAC. First I asked my model to open her eyes and look at me. I marked where I wanted the wing to end.
To achieve this I imagined a line as if I was to elongate her bottom las line and than drew this line. I than asked her to close her eyes and I connected the end of this line to the middle point of her top lash line with a straight line. I than asked her to open her eyes because the lines may look completely different when she opens her eyes. After I was happy with the angle and the line I connected it with the inner corner of her eye, making sure that the line is thinner towards the inner corner. I kept asking the model to look at me, making sure that the line is nice and even.
I than applied a coat of mascara with a small fan brush and defined her eyebrows by using an angled brush and a dark eyebrow pomade by Anastasia Beverly Hills.


On the other side I applied a lighter brown shade to the eyelid and also blended the same colour into the crease. I applied Black Track liner to the upper lash line with short strokes to define her top lash line but on this eye I did not create a cat-eye wing. I also applied a coat of mascara to thicken up the lashes and filled in any gaps in her eyebrows by using a dark brown eyeshadow and an angled brush.

Overview and evaluation:
I think we could learn more about eye shapes as we have never covered this in our lessons. I think it is very important to identify a person's eye shape in order to decide what kind of eye makeup would be the most flattering.
I also found that as much as I like Black Track by MAC for its creaminess and because it's really easy to work with it, I was not very happy with the intensity of it on my model's dark skin. It just did not give the eyes the definition I was hoping for.
Unfortunately this was the only gel eyeliner I brought with me for today's lesson so I could not use anything else. But if I was to use an eyeliner on my clients I would probably opt for something a bit more pigmented (e.g.: Inglot gel eyeliner, Maybelline Black gel eyeliner, Bobbi Brown gel eyeliner, etc...)
On the other hand I found it very interesting how a simple winged eyeliner can change the shape of the eyes. As you can see on the above pictures the blond model has slightly droopy eyes and I found it very interesting how her eyes were completely lifted after Holly applied the eyeliner to elongate her eyes towards the outer corners of the eyebrows.
Products List:
Products List:
- Kaeso Beauty Calming Cleanser
- Kaeso Beauty Calming Toner
- Kaeso Beauty Calming Moisturiser
- MAC Face & Body in shade N9
- MAC Face & Body in shade C4
- NYX Pro concealer palette
- Ben Nye Translucent Powder
- MAC Gold Mine eyeshadow
- MAC Rule eyeshadow
- MAC Embark eyeshadow
- MAC Carbon eyeshadow
- MAC Brun eyeshadow
- MAC Black Track gel eyeliner
- Anastasia Beverly Hills DipBrow Pomade in shade Dark Brown
- MAC Haute&Naughty Too Black Lash Mascara
Winged eyeliner Step by Step:
https://s-media-cache-ak0.pinimg.com/236x/22/87/e5/2287e57a767873d698aa9326aaacd713.jpg
No comments:
Post a Comment